
Do you want to create and sell custom screen-printed shirts but don’t know how to get started? This blog post will outline the basics of how screen printing works and what you need to get your business up and running. We’ll also discuss some of the benefits of t-shirt screen printing, so you can decide if this is the right method for producing your own t-shirts.
Step By Step Guide On Custom Screen Printing For Shirts
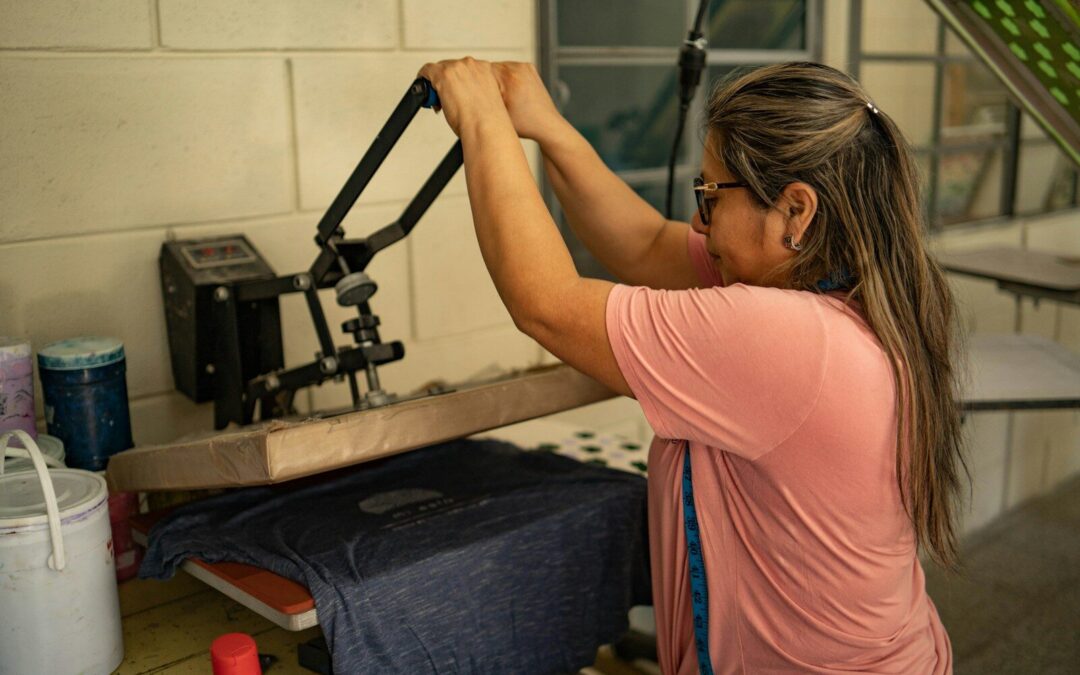
Photo by Hamed darzi on Unsplash
Prepare Your T-shirt Design
If you want to screen print shirts, you first need something to print on the shirt. It doesn’t matter if you design the artwork yourself or a customer brings it to you; all screen printing starts with some type of artwork. And when thinking about what kind of artwork you want on your t-shirts, always remember: what you put in is exactly what you get. Ultimately, the better the quality of your artwork, the higher-quality screen print you will end up with.
One thing to note is that when printing custom shirts via screen printing, you do so one color at a time. However, if you are using multiple colors in your design, you will need to find a way to separate these colors from each other in order to create different screens for your project–one color per screen.
Many screen printers use Illustrator, Photoshop, or Procreate to handle their artwork requirements. These programs break down and clean up the design so you can prepare it for printing.
Print The Film Positives
Once the artwork is created, and the colors are separated, the next step is to print a film positive. A film positive transparency is placed on top of the screen, and the design is exposed to light through the film. This creates a negative stencil of your artwork onto the mesh screen. There are several methods to make film positives. You may hand draw your picture on the film or acquire a compatible printer.
Expose The Image
After you print the film, it is time to create the screen. A screen printing frame consists of a wood or aluminum frame with polyester mesh stretched across it. The mesh keeps the image on the screen and lets ink pass through when you press down on it with a squeegee.
You will need to coat the mesh with emulsion in order for your design to be exposed onto the screen. But before you do that, you need to clean off any dust, lint, or particles from the surface by degreasing it with a special screen printing degreaser solution; this ensures no bumps or pinholes appear in your emulsion later on.
Emulsion is light-sensitive, so we typically coat the screen in a darkroom with special yellow bulbs that won’t jeopardize the emulsion. After the screen dries, we align the film positive over it and expose it to light from a printing exposure unit or an exposure bulb for a certain amount of time.
The exposed areas of the emulsion harden when hit by light, but since the film positive or black area of the film blocks out light, those parts of the emulsion remain soft. We then rinse offscreen with water. The soft part of the emulsion that was not exposed rinses away, leaving openings in the mesh that reflects your pattern.
Set Up Your Screens
Before you can screen print t-shirts, you’ll need to step up your screens. A screen printing press includes a base that supports printing platens, as well as numerous color arms. A manual press may range from a single-color 1 station to an eight-color six station. Naturally, if you have additional color arms, you can print more colors at once. If you have more printing stations, you may also produce items faster.
Before you clamp your screens into your press, tape off the edges of your frame with screen printing tape, this prevents ink from ending up where it shouldn’t be. If you’re producing a multicolored garment, you’ll need to register the colors together so that they line up properly when you combine all of the colors onto a single T-shirt.
When producing fine detail and multi-color outputs, a press with a laser guiding system or micro registration is highly beneficial. To verify that your screens are correctly aligned, perform a test print after you believe they’re in alignment.
Print Your Shirt
Before you print your design onto the shirt, be sure to apply adhesive to the platen. This helps the shirt stick to keep it from moving around while you are printing. Load your shirt onto the press and get your print head aligned. But before locking the printhead into place over your shirt, make sure to flood screen with ink first.
After you lock the print head in place, use your hand to push or pull the screen printing ink across the screen. You will likely need to do this more than once to get a sufficient amount of ink on the shirt. If you are using multiple colors, repeat these steps with your other screens.
Please note that you will likely have to briefly dry your screen-printed t-shirt in between prints if you want the colors to show up correctly, especially when printing dark garments with a white under base. The flash dryer helps by curing/setting the ink; this allows for another color print on top of the first layer. When you are finished printing, be sure to cure the print.
Curing is the process of making ink dry and set in fabric. You can use either a conveyor dryer or flash dryer to cure a shirt, but the temperature has to be just right — too high, and the ink will degrade; too low, and it won’t properly set. Read the instructions on your ink container to find out what temperature you need, then test whether the print has been properly cured by stretch-testing it and washing it. To check the temperature of your ink while curing, use a laser temp gun or donut probe.
Equipment Needed For Screen Printed T-shirts
Below we discuss some equipment needs for this process:
Flash Cure
We use flash cures when we want to press multi-color jobs. If you’re printing a design with multiple colors and need to dry the ink between prints, place the flash cure over one of the pallets. Water-based inks require air flash while plastisol inks require infrared flash.
Exposure Unit
The exposure unit exposes the screen using an LED vacuum top which is a photographic process that requires a light source, specifically UV light. While you can use sunlight as a resource for UV light, it’s not realistic to expect favorable weather conditions every day. Some popular alternatives to natural lighting are blue fluorescent tubes and quartz lights.
One thing to know about fluorescent light tubes is that they do not provide enough UV to harden the emulsion. The quartz light, like the fluorescent light, is in the same position. As a result, it’s critical to choose the proper light source for improved efficiency in your business.
A Screen Printer
A screen printer is a machine that prints designs onto fabric using a screen. The first step in the process is to create a stencil of your design on a piece of mesh stretched over a frame. Once the stencil is complete, ink is pushed through the mesh onto the fabric below.
The most common type of screen printing machine has one screen and can print one color at a time. However, there are also multi-color presses that have multiple screens and can print multiple colors simultaneously.
Screen Mesh
Screen mesh is a tight-knit weave of threads that forms a membrane over which ink will pass through during the printing process. The size of the holes in the mesh determines how much ink will be deposited on the fabric below.
A lower thread count results in a coarser print, while a higher thread count produces a finer print. The most common thread counts used in screen printing are 110, 156, and 230.
Ink
There are two main types of ink used in screen printing: water-based and plastisol. Water-based inks are made with water-soluble dyes, while plastisol inks contain PVC particles that suspend and harden when heated.
Water-based inks are typically used for printing on light-colored fabric, as they tend to produce brighter colors. Plastisol inks are more commonly used for printing on dark-colored fabric, as they provide better coverage and opacity.
Squeegee
A squeegee is a tool used to push ink through the screen mesh and onto the fabric below. The blade of the squeegee is made of rubber or silicone, and its size and hardness determine how much ink will be deposited on the fabric.
A soft squeegee will deposit less ink, while a hard squeegee will deposit more ink. The most common squeegee sizes used in screen printing are 10 inches, 12 inches, and 14 inches.
Emulsion
Emulsion is a light-sensitive liquid that coats the screen mesh and prevents the ink from passing through except for the areas exposed to light. Once the emulsion has been exposed to light, it hardens and creates a stencil of your design.
After the screen has been exposed, it is placed in a dark room and allowed to develop. This process can take anywhere from 15 minutes to an hour, depending on the type of emulsion used.
Benefits Of Screen Printing
There are many benefits of screen printing, which is why it is such a popular printing method. Screen printing is ideal for large-scale prints, as it can print on a variety of materials, including fabric, paper, plastic, and metal.
Screen printing is also a very versatile printing method, as it can be used to create a wide range of effects, such as gradient fades, two-tone prints, and raised prints. In addition, screen printing is a relatively simple printing process that does not require complex machinery. As a result, it is an affordable printing option for small businesses and hobbyists alike.
Final Thoughts
Screen printing is a popular printing method that is ideal for large-scale prints and offers a wide range of benefits. If you are considering screen printing for your next project, be sure to choose the right screen mesh, ink, and squeegee for your needs. With the proper tools and techniques, you can create high-quality prints that are sure to impress.