
Applying direct to film transfers should not feel complicated.
That is one of the biggest reasons we love DTF in the first place. With the right transfer, the right heat press, and a clear process, you can create clean, vibrant, professional results without needing in-house film printing equipment, specially formulated DTF inks, or a full production setup in your workspace.
At Limitless Transfers, we make DTF transfers simple for creators, small businesses, print shops, Etsy sellers, apparel brands, and DIY makers who want high-quality DTF transfers without the stress.
Our direct to film DTF transfers are ready to press, easy to apply, and designed to deliver vivid colors, fine details, and a soft finish on a wide variety of materials. Whether you are pressing t-shirts, hoodies, tote bags, cotton blends, polyester, leather, denim, canvas, or something more creative, proper application makes all the difference.
This guide will walk you through the process step by step so you can press with confidence, reduce mistakes, and get the best results from your transfers.
What You Need Before You Start
Before you apply your direct to film transfers, gather everything you need and set up your workspace. A smooth setup helps you avoid rushed decisions, crooked placements, or that classic “wait, where did I put the cover sheet?” moment.
Here is what you need:
- Your DTF transfer
- A heat press
- Your garment or material
- Parchment paper, finishing sheet, or protective cover sheet
- Heat-resistant tape, if needed
- Scissors or a cutter if using a gang sheet
- A clean, flat pressing surface
- A lint roller, if needed
- A ruler or alignment tool for placement
- Optional test garment or scrap fabric
If you ordered a gang sheet, cut out the individual designs before pressing. Leave enough space around each design so you can position it easily on the garment.
One of the benefits of custom DTF transfers is that you can arrange full color designs, logos, text, and artwork together on one sheet, then cut and press only what you need. This is a cost-effective way to save money, reduce waste, and keep production moving.
Before pressing, check your garment for lint, wrinkles, seams, zippers, pockets, or anything that could affect pressure. The more even your pressing area is, the better your final result will be.
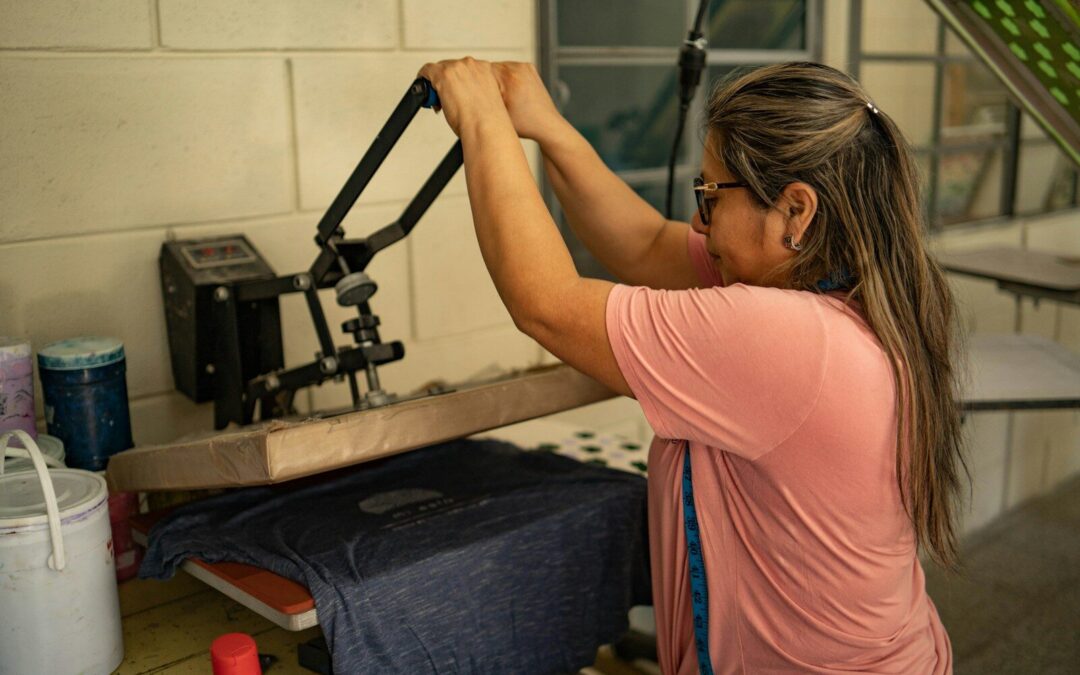
Heat Press Settings
Your heat press settings matter. Time, temperature, and pressure all work together to activate the adhesive and bond the transfer to the fabric.
For many Limitless Transfers DTF applications, a good starting point is:
- Temperature: 300 to 325°F
- Pressure: Medium pressure
- Time: 10 to 15 seconds
- Pre-press: 5 to 10 seconds
- Peel: Hot peel for true hot-peel transfers
Limitless notes that exact settings can vary depending on the fabric type and transfer, so always check the instructions for your specific order or material before production.
For cotton and cotton blends, DTF transfers commonly apply well within the 300 to 325°F range. For polyester or heat-sensitive materials, you may need to test carefully and adjust your heat or time to protect the fabric. For thicker garments, textured material, or specialty fabrics, testing is always a smart move.
Medium pressure is important. Too little pressure can cause poor adhesion. Too much pressure can flatten the print, affect the finish, or create unwanted marks on the garment.
A quick test press can save you from wasting a shirt, especially when working with a new material, a new heat press, or a high-value order.
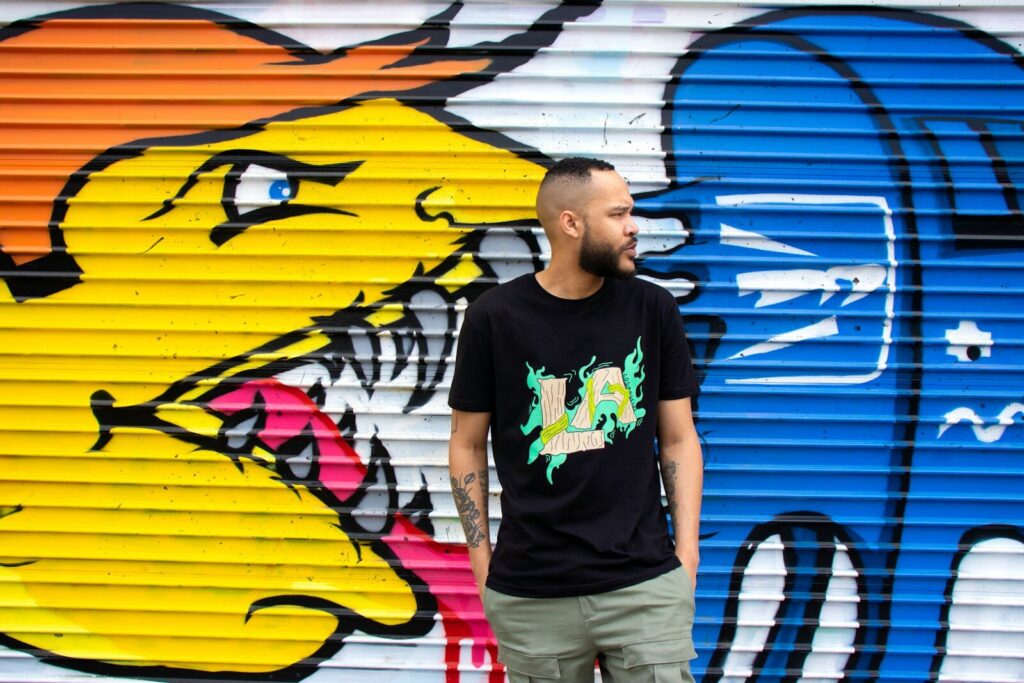
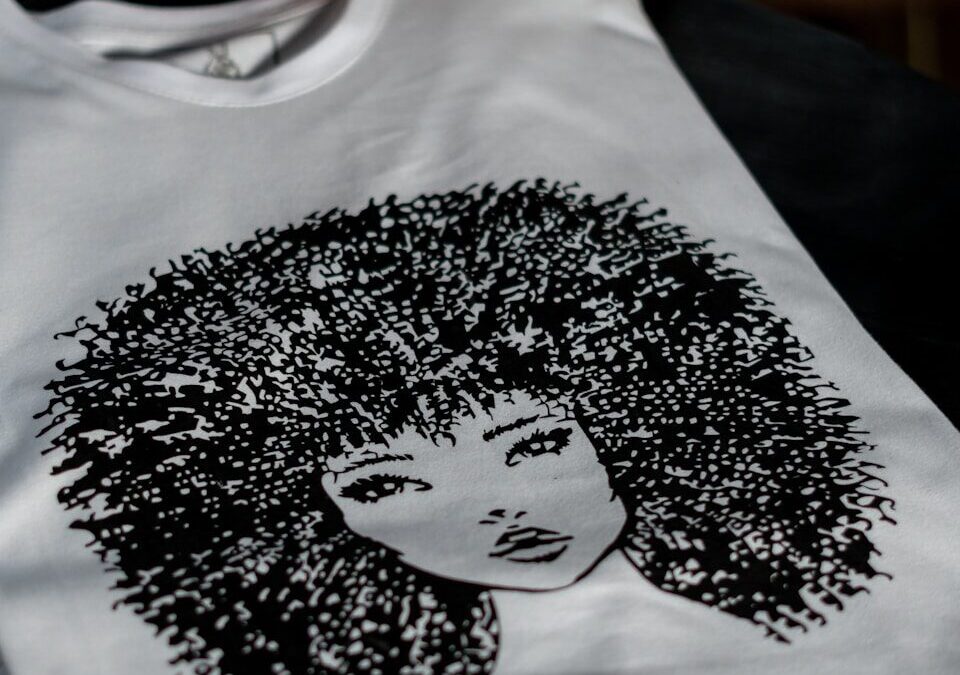
Photo by Corey Watson on Unsplash
Step-by-Step Application Process
Now let’s get into the actual application. This is the part you can follow in real time while you press.
Step 1: Turn On Your Heat Press
Set your heat press to the recommended temperature for your transfer and material.
For many DTF transfers, start around 300 to 325°F with medium pressure and a 10 to 15 second press. Let your heat press fully reach temperature before you begin.
Do not rush this step. A heat press that has not fully warmed up can create uneven adhesion, dull results, or lifting after the peel.
Step 2: Prepare Your Garment or Material
Place your shirt, hoodie, bag, or other item flat on the lower platen.
Smooth the material with your hands. Make sure there are no folds, seams, or raised areas under the print location. If you are pressing a shirt, check that the garment is straight and centered.
If you are working with a colored garment, especially a darker one, make sure the surface is clean and free of lint. Lint can get trapped under the transfer and affect the final look.
This is also the time to double-check the fabric. DTF works on many materials, including cotton, polyester, blends, nylon, leather, denim, and canvas, but every material responds differently to heat. When in doubt, test first.
Step 3: Pre-Press the Garment
Pre-press the garment for 5 to 10 seconds.
This removes moisture and wrinkles from the fabric, which helps the transfer bond properly. Limitless recommends pre-pressing before positioning the transfer for best results.
This step may seem small, but it matters.
Moisture can interfere with adhesion. Wrinkles can affect placement. A quick pre-press gives you a cleaner, flatter surface before the transfer goes down.
Step 4: Position Your DTF Transfer
Place the transfer film on the garment with the printed design facing down.
Take your time with alignment. Once you press, that design is staying where you put it. DTF is forgiving in many ways, but it is not going to politely slide two inches to the left because you changed your mind.
Use a ruler, placement guide, or visual reference if needed.
For left chest designs, center prints, sleeve prints, or full-back artwork, make sure your placement matches the style and size of the garment.
If your design has fine details, small text, or negative space, check that the film is flat and fully touching the garment. No bubbles, curls, folds, or raised edges.
Step 5: Cover the Transfer
Place parchment paper, a finishing sheet, or a protective cover sheet over the transfer.
This helps protect the film, garment, and heat press platen. It also helps distribute heat evenly across the design.
Make sure the cover sheet fully covers the transfer area.
Step 6: Press the Transfer
Close the heat press and apply medium pressure for 10 to 15 seconds.
Do not hover. Do not keep opening the press to check it. Let the heat press do its job.
The goal is even heat, proper pressure, and enough time for the adhesive to bond to the fabric. This is what gives your transfer durability, stretch, wash resistance, and a clean finish.
When the timer ends, open the press smoothly.
Cooling and Peeling Process
Because Limitless Transfers specializes in true hot-peel transfers, the peel process is fast. For true hot-peel DTF transfers, peel the film while it is still hot, right after pressing.
Here is how to do it:
- Open the heat press.
- Hold the garment steady.
- Grab one corner of the film.
- Peel smoothly in one steady motion.
- Keep the peel low and close to the garment instead of pulling straight up.
Do not yank the film. A smooth peel gives the adhesive and ink the best chance to release cleanly.
If part of the design lifts, stop peeling. Lay the film back down, cover it again, and press for a few more seconds. Then try peeling again.
A clean peel should leave the design fully bonded to the garment with vivid colors, sharp detail, and a soft finish.
What If the Transfer Does Not Peel Cleanly?
If the transfer lifts, cracks, or does not fully stick, check these common issues:
- The press temperature was too low
- The pressure was too light
- The press time was too short
- The garment had moisture
- The material was not compatible
- The press surface was uneven
- A seam, zipper, or pocket affected pressure
- The film was peeled too quickly or unevenly
Most application issues come back to heat, time, pressure, or surface prep.
That is why we always recommend testing when you are working with a new fabric, garment brand, or production setup.

Final Press Tips
The final press is one of the easiest ways to improve the feel, durability, and finish of your DTF transfer.
After peeling the film, place parchment paper or a finishing sheet over the design and press again for about 5 seconds. Limitless recommends a second press after peeling to help lock in the design and improve the final result.
This final press can help:
- Improve wash durability
- Smooth the print into the fabric
- Reduce shine
- Improve the soft-hand feel
- Create a more finished, professional look
- Help fine details settle cleanly
Do not skip this step if you want the best results.
It is quick, simple, and worth it.
Tips for Applying Custom DTF Transfers
Custom DTF transfers are one of the most flexible printing methods available because they allow you to press full color designs without weeding vinyl, layering colors, or setting up screen printing.
To get better results, keep these tips in mind:
Use High-Quality Artwork
The better your image, the better your print.
Use clean, high-resolution artwork whenever possible. Make sure your file has transparent background where needed, especially if your design includes negative space.
If you upload artwork with a background you did not intend to print, that background may show up in the final transfer. Always review your file before placing an order.
Pay Attention to Fine Details
DTF is great for fine details, but tiny text and ultra-thin lines still need enough thickness to press and wear well.
If your design includes small lettering, thin outlines, or detailed artwork, check the design at actual print size before ordering. What looks readable on a screen may be too small on a shirt.
Use a Gang Sheet to Save Money
A gang sheet lets you arrange multiple designs on one transfer sheet. This is a smart option if you are creating multiple shirt styles, logo sizes, sleeve prints, pocket prints, or repeat customer designs.
With our gang sheet builder, you can upload, arrange, and control your designs online. It is super easy to create a sheet that fits your production needs.
Match the Transfer to the Material
DTF works on many surfaces, but the fabric still matters.
Cotton, polyester, blends, denim, leather, canvas, and wood can all create different results. Some materials handle heat better than others. Some need lighter pressure. Some require extra care to avoid scorching, shine, or dye migration.
If the material is new to you, test before pressing a full order.
Keep Production Consistent
Once you dial in your best settings, write them down.
Track your temperature, pressure, time, garment brand, fabric type, and final results. This helps you stay consistent, especially if you are running a business, fulfilling customer orders, or managing high-volume production.
Consistency builds quality.
Quality builds trust.
Trust builds repeat customers.
Why Direct to Film Transfers Are a Popular Method
Direct to film has become a popular method because it solves a lot of problems that come with other printing methods.
Unlike sublimation, DTF can work on more than polyester and does not require light-colored garments. Unlike HTV, DTF does not require weeding every design by hand. Unlike screen printing, it does not require setup for each color or large minimum orders.
That makes DTF a flexible option for:
- Small businesses
- Print shops
- Etsy sellers
- Shopify brands
- Amazon sellers
- Event apparel companies
- Schools
- Sports teams
- Fundraisers
- Corporate apparel
- DIY creators
- Hobbyists
With film transfers, you can create full color designs, press them as needed, and keep production simple. You get vibrant color, detail, durability, and a professional finish without needing to manage the full DTF printing process yourself.
At Limitless Transfers, we handle the print side so you can focus on creating, pressing, selling, and growing.
Common Mistakes to Avoid With DTF Transfers
Even though DTF is easy to use, small mistakes can affect the finished product.
Here are the big ones to avoid:
Skipping the Pre-Press
Moisture and wrinkles can cause adhesion issues. Always pre-press before applying your transfer.
Using the Wrong Pressure
Pressure matters just as much as heat. If your pressure is too light, the transfer may not bond. If it is too heavy, you may affect the texture or finish.
Pressing Over Seams or Uneven Areas
Seams, collars, zippers, buttons, and pockets can prevent even pressure. Use a pressing pillow or adjust placement when needed.
Peeling Incorrectly
For true hot-peel transfers, peel while hot using a smooth, steady motion. If the transfer lifts, stop and repress.
Forgetting the Final Press
The final press helps improve durability and finish. It is a small step with a big payoff.
Not Testing New Materials
Every material reacts differently. Before pressing a full batch, test your settings on one item or scrap fabric.

Photo by Michael Kyule on Unsplash
Helpful DTF Transfer Resources
Want to learn more about DTF transfers, how they’re printed, how to apply them, and how to get the best results? These resources can help you better understand direct-to-film printing, heat press application, artwork setup, curing, garment care, and common mistakes to avoid.
- What Is Direct-to-Film Printing? A Guide to DTF Printing
- DTF: A New Way to Personalize Textile Printing
- The Pros and Cons of DTF and DTG Printing
- The Nuts & Bolts of Direct-to-Film Apparel Decorating
- The Tidal Wave That Is Direct-to-Film Apparel Decorating
- How to Identify High-Quality DTF Transfers
- 10 DTF Printing Mistakes and How to Fix Them
- Designing for DTF
- Designing for DTF Transfers
- Artwork Tips for DTF Transfers
- Direct-to-Film Transfers: Cricut Help Center
- TruePrint DTF Application Instructions
- Material Application Instructions from STAHLS’
- Heat Press 101 Tutorial
- Sizing and Placement Guidelines for T-Shirt Transfers
- How to Care for Clothes with Heat Transfers
- Ways to Properly Cure DTF Prints
- Heat Transfer Powder Curing Guide
- How to Print Direct to Film on Polyester and Performance Wear
- How to Create Special Effects with DTF Heat Transfers
Whether you’re ordering custom DTF transfers, preparing artwork for a gang sheet, learning proper heat press settings, or troubleshooting peeling and cracking, these guides offer helpful background for getting cleaner, longer-lasting results. Always follow the application instructions provided with your specific transfers, since temperature, pressure, time, and peel method can vary by product, fabric, and finish.
Ready to Press Direct to Film Transfers With Confidence?
Direct to film transfers make it easier to create professional results without expensive equipment, complicated setup, or large order minimums.
At Limitless Transfers, we make the process even easier with award-winning DTF quality, true hot-peel transfers, fast turnaround, no minimums, free UPS Ground shipping on orders over $50, and easy online ordering options.
You can upload your own file, build a gang sheet, order by size, and get transfers that are ready to press when they arrive.
Whether you are creating one shirt, launching a brand, fulfilling customer orders, or scaling a print shop, we are here to help you get consistent, professional results.
With the right settings, a clean press, and a little practice, you can create soft, durable, vibrant designs that look and feel amazing.
Order your custom DTF transfers today and start pressing with confidence.