
Do you know how to use heat transfer vinyl?
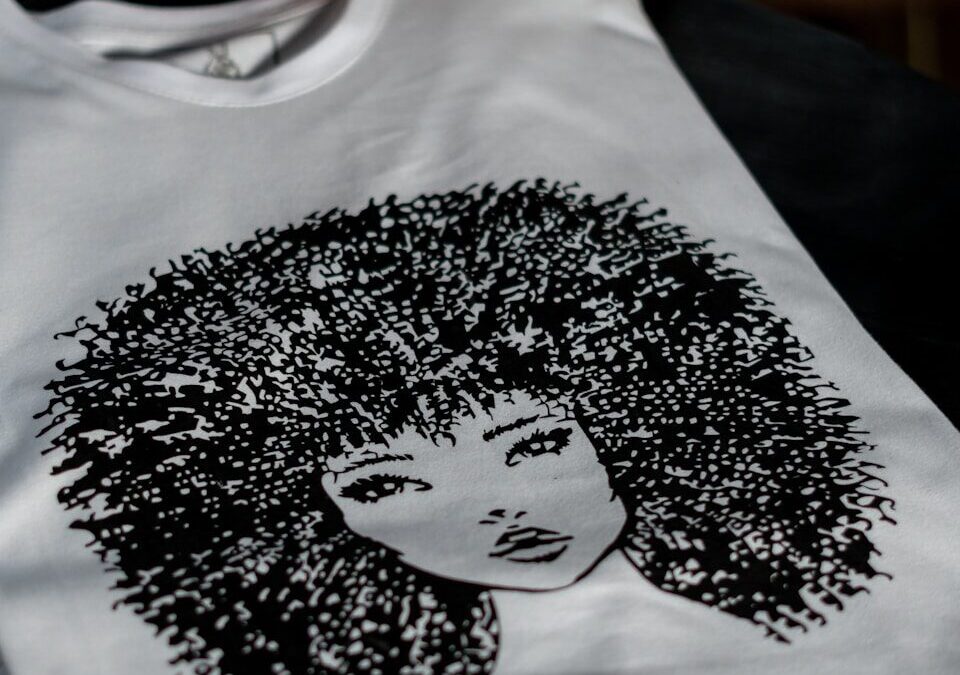
Heat transfer vinyl (HTV) is a popular tool for DIY enthusiasts looking to create custom designs for apparel, home decor, and craft projects. Whether you’re making personalized tote bags, designing t-shirts, or creating unique gifts, mastering heat transfer vinyl can elevate your projects to the next level. This guide will walk you through everything you need to know about using HTV, from preparing your design to applying it seamlessly.
But is HTV always the best choice? Stick around to discover how DTF (Direct-to-Film) transfers might offer an even better alternative for your crafting needs.
What is Heat Transfer Vinyl?
Heat transfer vinyl, also known as iron on vinyl, is a thin layer of colored polyurethane with a heat-activated adhesive. It’s designed to work with a variety of materials, including fabric, wood, and glass. Iron on vinyl requires heat and pressure to adhere to the surface, making tools like heat presses, irons, or Cricut EasyPress essential.
Key Features of HTV:
- It’s semi-permanent and can last over 50-100 wash cycles.
- Comes with a clear carrier sheet to protect the design during heat application.
- Available in various finishes like glossy, matte, glitter, and metallic.
While HTV is quite versatile, there are safety precautions to keep in mind. Always use the correct cutting machine settings, and never attempt to cut HTV with a laser cutter, as it can be hazardous.
Definition and Explanation
Heat transfer vinyl (HTV) is a type of vinyl material used to create designs and text on various fabrics, including t-shirts, tote bags, and more. It is a thin layer of colored polyurethane (PU) with a heat-activated adhesive that allows it to bond with the fabric when heat is applied. HTV is a popular choice for custom apparel, home decor, and gifts due to its versatility and durability. Whether you’re crafting personalized t-shirts or unique home decor items, HTV offers a reliable and creative solution for your projects.
Safety Tips for Working with Heat Transfer Vinyl
When working with heat transfer vinyl, it’s essential to follow some basic safety tips to avoid accidents and ensure a successful project. Here are some safety tips to keep in mind:
- Always read the instructions and guidelines provided by the manufacturer before starting your project.
- Use a heat press or iron in a well-ventilated area, away from children and pets.
- Wear protective gloves and eyewear when handling heat transfer vinyl and heat presses.
- Avoid touching the hot surface of the heat press or iron, as it can cause burns.
- Keep the heat press or iron away from flammable materials, such as fabric scraps or paper.
By adhering to these safety precautions, you can enjoy a smooth and safe crafting experience with your heat transfer vinyl projects.
Preparing Your Design
A flawless HTV project starts with a well-prepared design. Here’s a step-by-step approach to getting started:
It is crucial to prepare your design properly before you cut heat transfer vinyl to ensure optimal results.
1. Creating Your Design
Use software like Cricut Design Space or Silhouette Studio to create your design. Opt for SVG files, as they are the most commonly used with cutting machines.
Tip: Choose bold fonts and shapes—it makes weeding easier and ensures your design stands out.
2. Sizing and Mirroring
Measure your material (like a t-shirt or tote bag) to size your design correctly. Don’t forget to mirror your design before cutting. This ensures it reads correctly after application.
How to mirror your design:
- Select all layers while holding Shift.
- Use the “Reflect” option to flip the design horizontally.
3. Loading the Vinyl
Place the HTV shiny side down, ensuring the adhesive side is facing up (with the carrier sheet facing the mat), and align it properly on a cutting mat.
Cutting Heat Transfer Vinyl
A precise cut is key to a beautiful design. Follow these guidelines for the best results:
After cutting, the next step is to apply heat transfer vinyl to the project material.
How to Cut HTV with a Cricut or Silhouette
- Select the PU HTV vinyl setting on your machine.
- Load your cutting mat into the machine.
- Adjust cut pressure higher than the default setting, especially for intricate designs.
Tips for Intricate Designs
- Switch to a fine point blade.
- Reduce cutting speed to improve accuracy.
- Perform a test cut to ensure correct settings before cutting the entire vinyl.
Common Mistakes to Avoid When Cutting Heat Transfer Vinyl
Cutting heat transfer vinyl can be a bit tricky, especially for beginners. Here are some common mistakes to avoid when cutting HTV:
- Not mirroring the design: Always mirror the design before cutting to ensure it’s correct when applied to the project material.
- Not using the correct cutting settings: Use the recommended cutting settings for the specific type of heat transfer vinyl you’re using.
- Not weeding excess vinyl: Remove excess vinyl from around the design to ensure a clean and professional finish.
- Not applying enough pressure: Apply enough pressure to the heat press or iron to ensure the vinyl adheres properly to the fabric.
Avoiding these common pitfalls will help you achieve a flawless finish on your heat transfer vinyl projects.
Weeding and Preparing the Vinyl
Weeding involves removing the excess vinyl around your design, leaving only what you’ll transfer.
Weeding Tips:
- Use a weeding tool or even a credit card to remove small details and excess vinyl.
- Work on a well-lit surface to spot tiny pieces of vinyl that need to be removed.
- After weeding, place the design on a flat surface with the carrier sheet facing up.
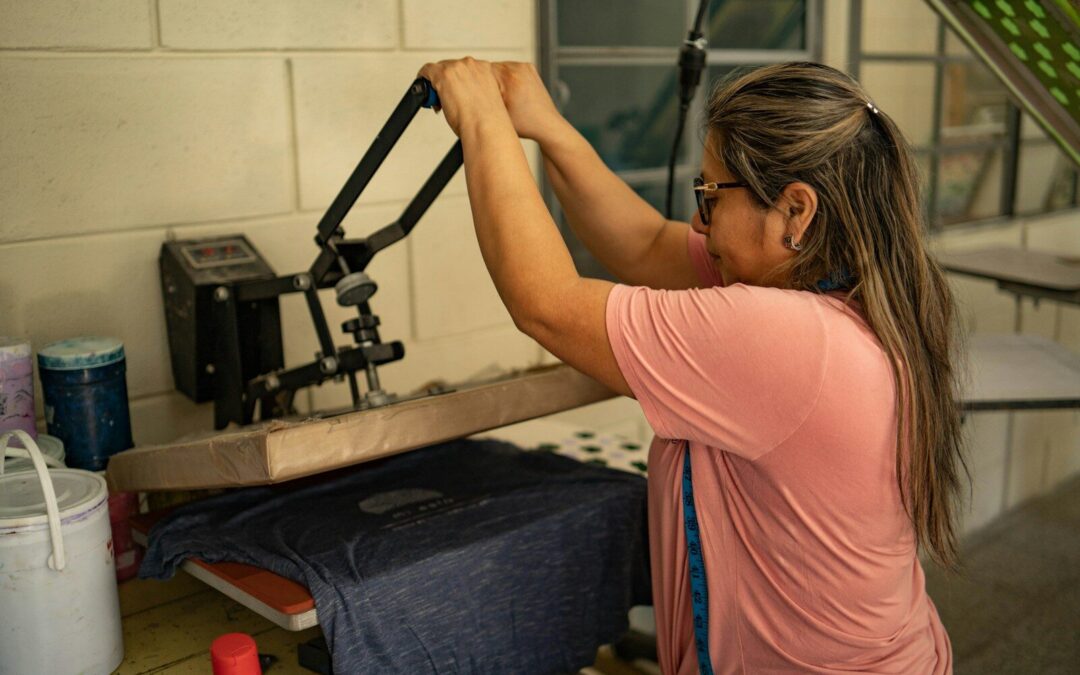
Applying Heat Transfer Vinyl
This is where the magic happens. Proper heat and pressure ensure a design adheres seamlessly. Essential tools for this process include a heat press machine, which provides the necessary time and temperature settings for effective application. Knowing how to press heat transfer vinyl correctly is crucial for achieving the best results.
The process of applying heat transfer vinyl, or vinyl transfer, involves using specific tools and techniques. Whether you use a heat press machine or a household iron, understanding the correct temperature settings and pressing techniques is key to a successful application.
Heat Press Techniques
- Preheat your heat press to the manufacturer’s recommended temperature.
- Place your material on the press, and preheat it for a few seconds to remove moisture and wrinkles.
- Position your vinyl design (with the carrier sheet side up) on the material.
- Apply heat and medium pressure for the specified time.
- Carefully peel off the carrier sheet, ensuring the HTV has adhered fully to the material.
Tips for Different Materials
- For cotton or silk, use lower temperatures.
- For thicker materials like wood or glass, increase temperature and pressure slightly.
Caring for Your Heat Transfer Vinyl Projects
Ensure your design stays vibrant and intact with proper care.
Care Instructions
- Wait 24 hours before washing your project.
- Wash garments inside-out with cold water and mild detergent.
- Avoid fabric softeners, bleach, or tumble drying. Line drying is ideal.
Improper care can lead to peeling or fading of the vinyl design. Always follow these care guidelines to extend the life of your project.
Troubleshooting Common Issues
Even seasoned crafters encounter hiccups. Here’s how to troubleshoot common HTV problems:
Common Issues:
- Vinyl not sticking? Check if the temperature or pressure is too low.
- Design peeling off? Ensure you didn’t remove the carrier sheet prematurely.
Solutions:
- Reapply heat and pressure.
- Perform a full re-cut and reapply if errors persist.
Advanced Techniques with HTV
Feeling confident? Step up your crafting game by exploring advanced techniques:
Layering Heat Transfer Vinyl
- Apply the base layer first, then add subsequent layers, one at a time.
- Use parchment or Teflon sheets to protect your design during each press.
Using HTV on Wood and Glass
- Clean and prep the surface thoroughly.
- Use a sealant post-application for long-lasting results.
Choosing the Right Heat Transfer Vinyl
With so many types of heat transfer vinyl available, it can be overwhelming to choose the right one for your project. Here are some factors to consider when selecting HTV:
- Fabric type: Different types of heat transfer vinyl are suitable for different types of fabrics. For example, Siser Easyweed is a popular choice for cotton and polyester blends, while Siser Easyweed Stretch is ideal for stretchy fabrics like spandex.
- Design complexity: If you’re creating a complex design with intricate details, you may want to choose a heat transfer vinyl with a higher level of detail and precision.
- Durability: If you’re creating a project that will be subject to heavy wear and tear, you may want to choose a heat transfer vinyl with a higher level of durability and resistance to fading.
By considering these factors, you can select the perfect heat transfer vinyl for your specific needs.
Types of Heat Transfer Vinyl and Their Uses
Here are some common types of heat transfer vinyl and their uses:
- Siser Easyweed: A popular choice for cotton and polyester blends, Siser Easyweed is easy to cut and weed and can be applied at low temperatures.
- Siser Easyweed Stretch: A stretchy vinyl ideal for maternity shirts and larger chested individuals, Siser Easyweed Stretch is durable and easy to weed.
- Stripflock Pro: A non-stretchy vinyl that weeds easily and has a raised texture, Stripflock Pro is ideal for creating textured designs and patterns.
- Cold Peel: A type of heat transfer vinyl that must be allowed to cool completely before removing the clear plastic sheet, cold peel is ideal for creating intricate designs and details.
Understanding the different types of heat transfer vinyl and their specific applications will help you choose the best material for your projects.
Is DTF Better Than HTV?
While HTV is a popular choice for DIYers, DTF transfers offer some compelling benefits:
- Durability: DTF transfers are more durable and can remain vibrant after countless washes.
- Ease of Application: No weeding is required, making it faster and easier.
- Material Versatility: Works on nearly any surface, including leather, nylon, and canvas, without needing different types of vinyl.
Limitless Transfers offers high-quality DTF transfers with features such as:
- Hot Peel for faster and easier application.
- Full Color and Fine Detail for professional-looking designs.
- Compatible with virtually all materials.
If you’re looking for a time-saving, professional alternative that tackles HTV’s common challenges, DTF may be worth exploring.

The Final Press | How To use Heat Transfer Vinyl
Heat transfer vinyl is a fantastic tool for crafting enthusiasts looking to personalize their projects. Whether you’re creating custom t-shirts, tote bags, or wood decor, understanding how to use HTV properly is essential for achieving perfect results.
However, if you’re ready to elevate your designs and save time, consider exploring DTF transfers as a superior alternative.
Get started with Limitless Transfers for high-quality DTF solutions that make crafting easier than ever. Whether you’re team HTV or ready to try DTF, the possibilities are endless!
Resources
Here are some helpful resources to get you started with HTV and DTF transfers:
- Guide to Heat Transfer Vinyl (HTV) – Learn the basics of using HTV for your crafting projects, from material selection to application tips.
- Introduction to DTF Transfers – Discover the key features and benefits of Direct-to-Film transfers.
- How to Care for HTV and DTF Designs – Keep your designs looking vibrant and long-lasting with these care instructions.
- Limitless Transfers Shop – Explore the wide variety of high-quality DTF transfer options offered by Limitless Transfers.
- Common Mistakes to Avoid with HTV – Learn about frequent errors crafters make when using HTV and how to prevent them.
- Advanced Techniques for DTF Transfers – Explore expert-level methods to take your DTF projects to the next level.
- Comparing HTV and DTF Transfers – Understand the differences between these two popular transfer methods and how to decide which is best for your project.
- Printable HTV Tips and Tricks – Gain insights into working with printable HTV for complex designs and patterns.
- DTF Troubleshooting Guide – Find solutions to common issues you may encounter when using these materials.
These additional resources will further empower you to create stunning, professional-quality designs with ease.