A heat press machine applies controlled heat, pressure, and time to transfer designs onto garments and substrates. Choosing the right machine depends on your products, production volume, platen size needs, and budget. Key machine types include clamshell, swing-away, auto-open, automatic, and specialty presses for mugs and caps.
The heat press machine is one of the most important investments anyone serious about custom apparel will make. Whether you’re pressing your first T-shirt or running a high-volume print shop, the machine you choose shapes how fast you work, how consistent your results are, and how confidently you can scale.
We’ve worked with thousands of creators, small businesses, and established print shops across the country. One thing we hear constantly is that people spent too long choosing the cheapest machine available and paid for it through failed transfers, cold spots, inconsistent pressure, and frustration. The right press doesn’t have to be the most expensive one on the market—but it does need to deliver reliable heat, accurate timing, and consistent pressure every single time.
This guide is built for hobbyists just getting started, Etsy and Shopify sellers looking to streamline production, startups building a custom apparel brand, and established print shops evaluating an upgrade. We’ll cover how heat presses work, the major machine types, the features that actually matter, realistic pricing tiers, common mistakes to avoid, and how to match your press to your projects—including DTF transfers, HTV, sublimation, custom T-shirts, hoodies, tote bags, hats, mugs, and more.
By the time you finish reading, you’ll know exactly what to look for and what to avoid.
Photo by Hello Massamba on Unsplash
What Is a Heat Press Machine?
A heat press machine is equipment specifically designed to apply controlled heat and pressure to transfer designs onto compatible surfaces. Unlike a household iron—which applies inconsistent heat across an irregular surface while you manually push it around—a heat press clamps down with a flat, heated upper platen and holds it in place for a precise amount of time.
The basic heat press workflow looks like this:
- Position the garment or substrate on the lower platen.
- Place the transfer on the material.
- Set the required temperature on the machine.
- Set the pressing time.
- Apply the correct pressure.
- Close the press and allow the timer to run.
- Open the press and peel according to your transfer’s specific instructions.
Heat-transfer temperatures typically fall somewhere between 250°F and 400°F, and pressing times are commonly measured in seconds—anywhere from roughly 10 to 60 seconds, depending on the application and materials involved. There is no single correct setting that works across all transfer types and fabrics. Always follow the instructions provided by your specific transfer or HTV manufacturer.
For a practical look at how temperatures and pressing times change across different materials and HTV types, the SINGER Heat Press Temperature Guide is a helpful reference showing just how much variation exists across fabrics like cotton, denim, nylon, polyester, and silk.
How Heat and Pressure Create a Successful Heat Transfer
Heat activates the adhesive, ink, or dye involved in the transfer process. Pressure ensures that activated adhesive makes full, even contact with the fibers of the garment or substrate. When either variable is off—too little heat, uneven pressure, incorrect timing—the result is a transfer that lifts at the edges, peels after a few washes, or simply doesn’t adhere cleanly in the first place.
This matters even more when you’re producing multiple pieces. A single failed shirt is an inconvenience. A batch of failed shirts on a deadline is a serious problem. Reliable equipment makes results repeatable, and repeatability is what separates hobbyist-level output from professional production.
Why Consistent Temperature Matters in a Heat Press
Not all heat presses heat evenly. Inexpensive machines can develop cold spots—areas of the platen that run significantly lower than the displayed temperature. According to the HTV temperature guide from Total Ink Solutions, cheap heat presses can run 20–30°F below their displayed temperature, which is enough to cause adhesive under-curing and edge peeling—even when the operator did everything else correctly.
A quality machine’s upper platen should distribute heat uniformly from edge to center. This becomes especially important when pressing large chest graphics or gang sheets of smaller transfers. If the left side of the platen is hitting 315°F while the right side is sitting at 290°F, you’re going to see inconsistent results across the same press.
If you’re running consistent production, it’s worth verifying your press temperature with a laser thermometer or temperature strips. Trust the reading on your platen surface, not just the display.
Digital Controls Make Heat Transfer Projects More Repeatable
Digital temperature controls make it easy to dial in precise settings and hold them across a full production run. A digital timer removes human error from the equation—you don’t have to count seconds or estimate when to lift the press. Both controls working together let you lock in a setting, repeat it across dozens or hundreds of pieces, and know that each one received the same treatment.
For small businesses and print shops handling larger orders, repeatability isn’t a nice-to-have. It’s the foundation of a reliable production system. Analog or dial-based controls introduce guesswork that compounds across volume.
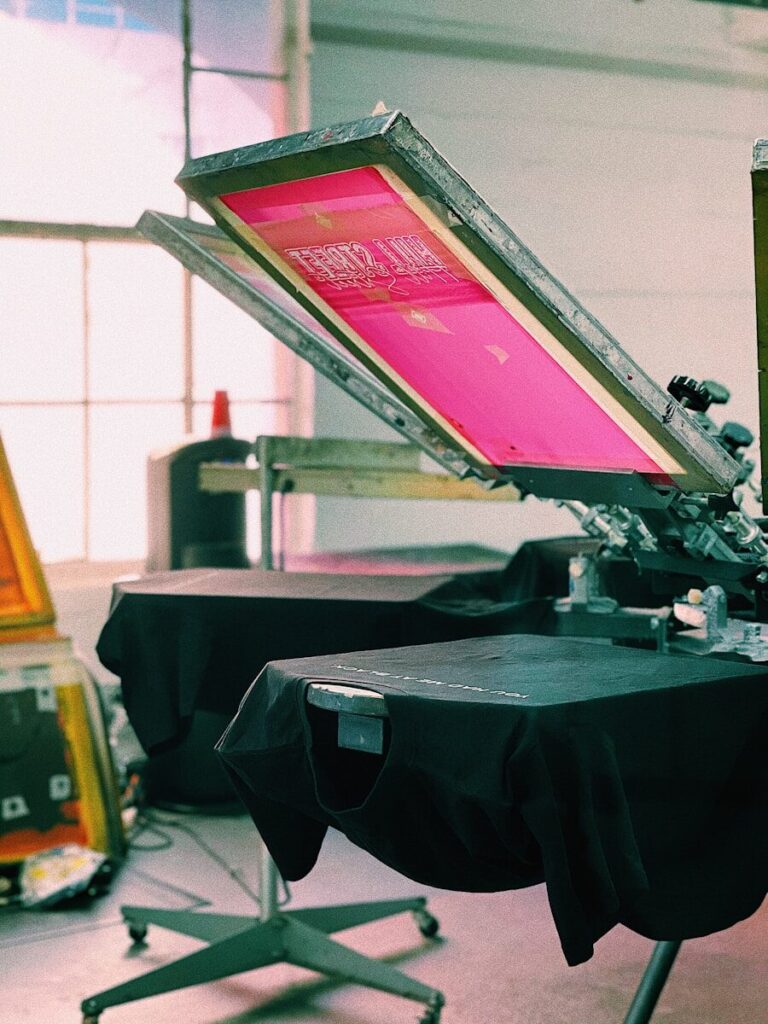
Photo by Naomi August on Unsplash
Understanding Pressure on a Heat Press
Temperature alone does not create a successful transfer. Pressure is what forces the adhesive into contact with the fabric fibers and ensures complete bonding across the full surface of the design.
Too little pressure and the transfer lifts, especially at the edges and fine-detail areas. Too much pressure on delicate materials can crush the fabric or distort specialty vinyl finishes like puff or foil. Getting pressure right means understanding what your press is actually applying—and being able to adjust it consistently.
Manual vs. Automatic Pressure
Manual presses—including clamshell and swing-away machines—rely on the operator and the press mechanism to apply force. The operator adjusts a pressure knob or dial, closes the press, and latches it. This works well for most small-business applications when the operator is consistent.
Some commercial automatic or pneumatic presses use compressed air to deliver repeatable, measurable pressure across every press cycle. This removes operator variability from the equation entirely, which matters when you’re running hundreds of pieces per day or when multiple people operate the same machine.
As production volume grows, consistent pressure becomes increasingly valuable. A press that applies slightly different pressure depending on who’s closing it is a source of quality variation that’s easy to overlook until the failed shirts start coming back.
Types of Heat Press Machines
The right machine style depends on your workspace, budget, products, production volume, and workflow. Here’s what we see customers working with most often.
Clamshell Shirt Press
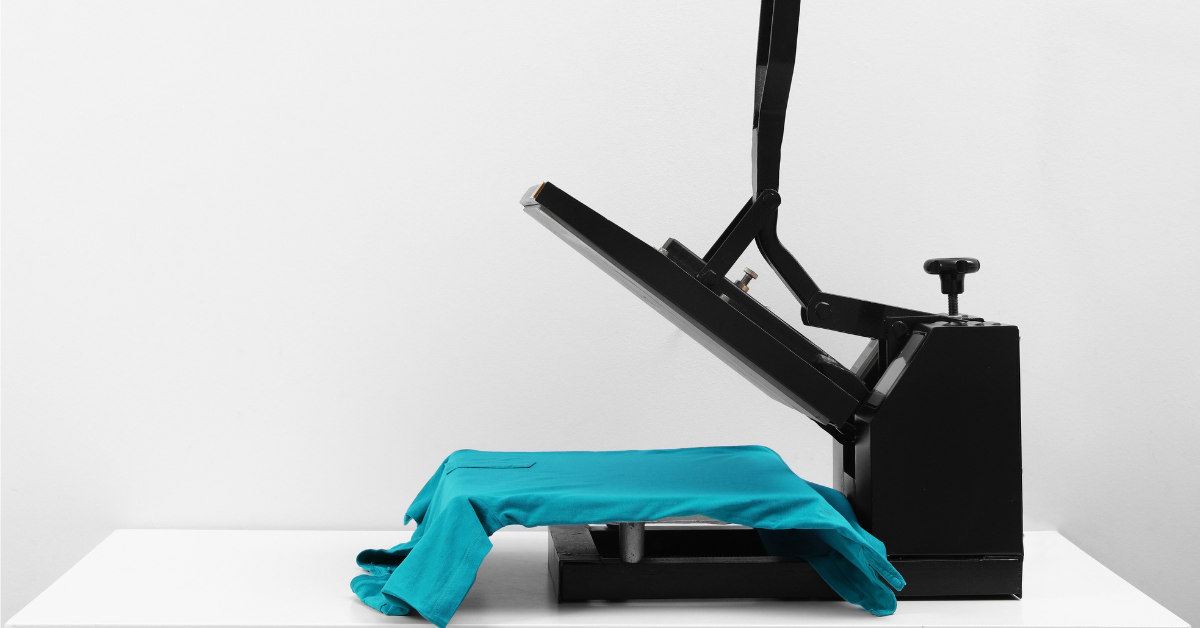
The clamshell is the most common entry-level and intermediate heat press design. The upper platen is hinged at the back and opens upward—like a clamshell—when you unlatch it. It has a compact footprint and fits well in smaller workspaces.
Clamshell presses are popular among hobbyists, Etsy sellers, startups, and small businesses pressing custom T-shirts, hoodies, tote bags, and other relatively flat items. The main trade-off is that the heated upper platen opens directly above the lower platen, which means you’re positioning your garment close to the hot surface. Operators get used to this quickly, but it’s worth noting as a workflow consideration.
Swing Away Heat Press
On a swing-away press, the heated upper platen rotates sideways—away from the lower platen—before and after pressing. This gives you full, unobstructed access to the lower platen for garment positioning.
The practical benefit is that you’re placing and adjusting your garment without a hot platen directly overhead. This can reduce accidental contact with the heated surface during positioning, which matters in high-paced production environments. Swing-away machines generally require more table space than clamshell designs because the upper platen needs room to rotate, but many operators find the added workspace worthwhile.
Auto Open Heat Press
An auto-open press releases and lifts the upper platen automatically when the programmed pressing time is complete. This sounds like a small feature, but in practice it makes a meaningful difference. The operator doesn’t have to stand over the machine watching a timer—they can set the press, step away to prepare the next piece, and return when the press opens.
Auto-open designs also reduce the risk of accidentally overpressing a garment if the operator gets distracted. For growing operations where every second of production time matters, this feature pays for itself quickly.
Automatic Heat Press Machines
Fully automatic and pneumatic presses take operator involvement a step further. Air-pressure systems deliver consistent, repeatable force across every press cycle. Some designs include automatic loading, auto-open, and advanced digital controls that store multiple preset programs for different transfer types and materials.
These machines represent a larger investment, but for shops pressing dozens to hundreds of pieces per day, the gains in consistency, speed, and reduced operator fatigue justify the cost. If you’re currently producing ten shirts per day and growing toward 100+, automation is worth putting on your roadmap.
Specialty Mug Press and Cap Press Machines
Flat heat presses are designed for flat surfaces. They don’t work well on curved products like mugs, tumblers, or structured hats. That’s where specialty equipment comes in.
A mug press wraps a heated element around a compatible mug or tumbler and applies heat evenly across the curved surface—essential for sublimation transfers on drinkware. A cap press uses a curved platen sized and shaped to match the front panel of a structured hat. Interchangeable platen systems on some machines let you swap between flat, curved, and specialty surfaces without purchasing an entirely separate machine for each product type.
For educational context on heat-press operation and safe equipment use, the University of Nebraska–Lincoln Innovation Studio’s heat press resource offers a helpful introduction to basic press workflows and safety practices.
What Platen Size Should I Choose?
The platen is the heated pressing surface—the flat plate that contacts your garment during pressing. Platen size determines what you can press and how efficiently you can press it.
Common entry-level and intermediate platen sizes include approximately 12″ x 10″ and 15″ x 15″. A 15″ x 15″ platen has become a popular versatile choice for apparel because it accommodates most adult T-shirt chest graphics without requiring the operator to reposition the garment mid-press.
Larger platens can improve efficiency when pressing large graphics, but they require more table space and generally cost more. A larger platen isn’t automatically better if workspace or portability is a priority.
Interchangeable Platens Add Versatility
Some presses support interchangeable platens that can be swapped in for different applications—youth garment sizing, sleeve prints, bag handles, or other specialty applications. This flexibility allows a growing shop to expand its product range without immediately purchasing a separate machine for every new substrate.
If you’re planning to press youth apparel, sleeves, or small items regularly, check whether your target machine supports interchangeable platens before buying.
Heat Press Machine Features Worth Looking For
Before committing to a purchase, evaluate these features carefully:
- Quality heating elements — the foundation of even heat distribution
- Uniform heat across the full platen surface — no cold spots
- Reliable temperature control — the display should reflect what’s actually happening at the platen
- Digital temperature display — easier to monitor and adjust than analog dials
- Digital timer — removes guesswork from pressing time
- Adjustable pressure — not all materials and transfers need the same force
- Solid construction — particularly important for daily production use
- Durable hinges and moving components — these take thousands of open-and-close cycles
- Appropriate platen size for the products you intend to press
- Auto-open capability — valuable for multitasking and preventing overpressing
- Interchangeable platens — expands product range without additional machines
- Manufacturer support and available replacement parts — a press with no support network is a liability
Solid construction matters more than it might seem. A machine that feels flimsy out of the box will feel worse after 10,000 presses. Hinges, latch mechanisms, and pressure adjustment hardware wear over time, and budget machines often show that wear quickly.
Heat Press Safety Features
Heat presses operate at temperatures that can cause serious burns on contact. Safety features aren’t optional—they’re part of choosing the right equipment.
Look for auto-shutoff protection, insulated handles, and designs that position the hot platen away from the garment-loading area when open. Swing-away and drawer-style presses move the heated platen sideways or back during loading, which reduces accidental contact compared to clamshell designs where the hot platen opens directly overhead.
Maintain a clear, organized workspace around your press. Follow the manufacturer’s safety guidelines for your specific machine. For broader workplace heat-safety guidance, OSHA’s Heat Exposure resource covers principles of working safely around heated equipment and high-temperature environments. Additionally, the U.S. Consumer Product Safety Commission provides electrical safety guidance relevant to any powered equipment used in home workspaces and small shops.
Heat Press Machine vs. Household Iron
A household iron and a dedicated heat press are not interchangeable tools. They look similar—both apply heat to fabric—but that’s roughly where the similarity ends.
|
Feature |
Household Iron |
Heat Press |
|---|---|---|
|
Temperature consistency |
Inconsistent across surface |
Uniform across platen |
|
Heated surface area |
Small, triangular |
Full flat platen |
|
Pressure |
Manual, varies by operator |
Controlled and adjustable |
|
Timing |
Manual count |
Digital timer |
|
Repeatability |
Low |
High |
A household iron’s heating element doesn’t distribute heat evenly across its surface. Applying consistent manual pressure across the full area of a design for 10–15 seconds is difficult to do repeatedly. The result is inconsistent adhesion, edge lifting, and transfers that look fine initially but fail after a few washes.
For anyone pressing more than a handful of garments, a dedicated heat press is a better investment. The improvement in consistency alone reduces the waste and rework that eats into profit margins.
For additional context on how even heating and consistent pressure affect transfer quality—and why the differences between irons and heat presses matter for results—Siser’s heat transfer education resources offer useful background on the relationship between equipment and application quality.
Heat Press Machine vs. Vinyl Cutters
These two machines are frequently mentioned in the same breath, but they serve completely different roles in a heat transfer workflow.
A vinyl cutter cuts designs from heat transfer vinyl (HTV) or similar materials. A heat press applies the finished transfer to the garment. They work together in a traditional HTV workflow—cut the design, weed the negative space, press the vinyl onto the shirt.
DTF transfers change that workflow significantly. With DTF, the full-color, photo-quality design arrives already printed and ready to press. There’s no cutting, no weeding, no layering vinyl colors. For complex multicolor designs or photographic artwork, DTF eliminates several production steps entirely.
This is one reason DTF has grown so quickly in the custom apparel market. The press is still essential—you still need controlled heat, accurate pressure, and precise timing—but the design arrives ready to go straight from the transfer to the platen.
Using a Heat Press for DTF Heat Transfer Projects
Direct-to-Film (DTF) printing is a process where designs are printed onto a special film, coated with a heat-activated adhesive powder, and cured before being transferred onto fabric using a heat press. The result is a full-color, vibrant design that bonds to cotton, polyester, blends, nylon, canvas, denim, leather, and many other materials.
DTF has become popular for exactly the reasons you’d expect: it handles complex, full-color artwork without cutting or weeding, works on light and dark fabrics, produces a soft hand feel, and delivers durable results across a wide range of materials. For a thorough introduction to how the Direct-to-Film process works, Cricut’s guide to DTF transfers explains the relationship between printed film, adhesive powder, and heat press application in accessible terms.
At Limitless Transfers, we supply true hot-peel DTF transfers—meaning you remove the carrier film immediately after pressing according to our application instructions, rather than waiting for a cold peel. This accelerates production significantly when you’re pressing high volumes.
How We Apply Our Hot-Peel DTF Transfers
Here’s the practical workflow we recommend when pressing our transfers. Always refer to our current application instructions for exact temperature, time, and pressure settings, as these can vary by fabric and substrate.
- Turn on your heat press and allow it to preheat for approximately 5–10 minutes so the platen reaches a stable operating temperature. Don’t start pressing immediately after powering on—let the machine stabilize.
- Prepare and position your garment on the lower platen.
- Pre-press the garment for a few seconds to remove moisture and wrinkles. This is a step many beginners skip, and it causes bubbles and inconsistent adhesion.
- Position our DTF transfer on the garment according to your placement plan.
- Apply the specified heat, time, and pressure per our instructions.
- Open the press.
- Because our transfers are true hot peel, remove the carrier sheet immediately according to our application instructions while the transfer is still warm.
- Complete any recommended finishing press.
When appropriate for your application, using a suitable Teflon or PTFE sheet over the transfer can help protect the platen surface and the garment during pressing.
Heat Press Settings for HTV, DTF, and Sublimation
There is no universal heat press setting. This is one of the most common misconceptions among beginners, and it leads to more wasted shirts than almost any other mistake. Here’s a practical breakdown by transfer type—but always treat manufacturer instructions as the authority for your specific product.
Standard HTV
A commonly referenced starting point for standard HTV products like Siser EasyWeed is approximately 305°F for 10–15 seconds with medium pressure. According to Total Ink Solutions’ HTV temperature and time guide, specialty films shift those numbers significantly: puff HTV typically presses at 290°F, glitter HTV at 320°F, and sublimation HTV can require 385°F for 45–60 seconds. These are not interchangeable settings.
DTF
Settings depend on the specific transfer, adhesive formulation, garment, and supplier. When pressing our transfers, follow the Limitless Transfers application instructions for your specific fabric and substrate. Don’t assume that what worked on a 100% cotton T-shirt will produce the same result on a nylon bag or canvas tote.
Sublimation
Sublimation requires its own temperature and time settings—generally higher than standard HTV—so that dye fully migrates into compatible materials. Sublimation works best on polyester and polyester-coated substrates. Different blanks require substantially different settings, so always follow the blank manufacturer’s specifications.
The SINGER Material-Specific Heat Press Settings guide illustrates how dramatically temperature and time requirements vary across fabrics—from 280°F for nylon and silk to 340°F for cotton canvas.
What Can You Make With a Heat Press?
A quality heat press opens up more product categories than most beginners expect. Flat presses with standard platens handle:
- Custom T-shirts and long-sleeve shirts
- Hoodies and sweatshirts
- Tote bags and canvas bags
- Workwear and uniforms
- Team and school apparel
- Event merchandise and fundraiser shirts
- Promotional apparel
- Patches
- Pillow covers and home goods
Pair your flat press with specialty platens or dedicated equipment and the range expands further:
- Hats and caps with a curved cap press or compatible cap platen
- Mugs and tumblers with a mug press
- Compatible sublimation products including coated aluminum panels, mousepads, and more
This versatility is what makes a heat press genuinely valuable as a business investment. One machine can serve an apparel brand, a promotional products company, an event merchandise operation, and an e-commerce store selling custom gifts.
How Much Does a Heat Press Machine Cost?
Prices vary widely by manufacturer, machine type, platen size, construction quality, and automation level. Here are realistic general budget categories to orient your search.
Entry-Level Heat Press Machines — Approximately $100–$500
Entry-level machines are best suited to hobbyists, new businesses, and crafters testing the waters. They commonly offer platen sizes around 12″ x 10″ or 15″ x 15″ and basic digital controls. The trade-offs at this price point can include less even heat distribution, lighter construction that shows wear faster, and less accurate temperature readings. These machines can produce good results, but they may require more attention to calibration and settings verification.
Professional Heat Press Machines — Approximately $500–$2,000+
Professional machines are built for more frequent production. At this price range, you can expect heavier construction, more reliable digital controls, better heat distribution, larger platen options, auto-open mechanisms, interchangeable platen compatibility, and stronger manufacturer support. For businesses pressing garments daily, the consistency and durability gains at this price tier typically justify the investment within the first several months of production.
Specialty and Sublimation Presses
Dedicated sublimation equipment, mug presses, and specialty platen systems involve additional costs on top of a standard flat press. Factor these into your equipment roadmap if mugs, caps, or sublimation products are part of your current or planned product mix.
The right press is the one that fits your workflow—not the one with the lowest price tag.
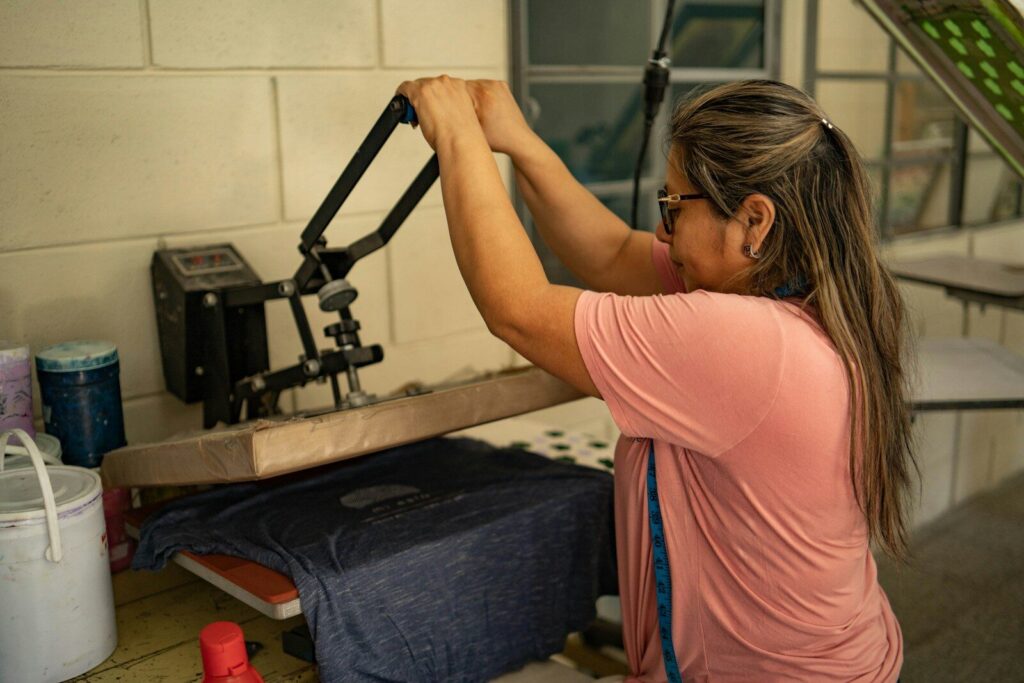
Photo by Shelby Murphy Figueroa on Unsplash
Is a Heat Press Machine Worth It for Small Businesses?
For any business producing custom apparel with consistency, a reliable heat press is one of the most valuable tools you can add to your production setup. Here’s what a good machine delivers:
- Faster production with repeatable settings
- Consistent results across large runs
- Expanded product range (shirts, bags, hats, mugs, patches, and more)
- Professional finish that justifies premium pricing
- Ability to scale output as order volume grows
Someone pressing five shirts per month has different needs than a shop fulfilling 500 pieces per week. But even at low volumes, the difference between a reliable press and a struggling one shows up in quality, rework time, and customer satisfaction.
One of the most effective ways to scale custom apparel production without investing in an in-house DTF printer is to pair a quality heat press with outsourced, ready-to-press DTF transfers. The press handles the application. The transfers handle the full-color print quality. The combination lets small businesses and growing print shops produce professional results without the capital and operational overhead of running their own printing equipment.
How to Choose the Best Heat Press for Your Business
Before purchasing, ask yourself these questions:
- What products will we press most often?
- What is the largest design we expect to produce?
- What platen size do we need to accommodate that design?
- How much workspace is available in our production area?
- How many products will we produce per day or week?
- Do we need manual operation, auto-open, or full automation?
- Will we need interchangeable platens for multiple product types?
- Are we pressing shirts only, or do we need to accommodate hats, mugs, or specialty items?
- How accurately does the machine maintain temperature across the platen?
- Can pressure be adjusted easily and reliably?
- What safety features are included?
- What warranty, replacement parts, and customer support are available?
- Does this machine fit our current budget while supporting growth?
Work through this list honestly. A machine that checks every box for your current needs but can’t scale with your business will need to be replaced sooner than you’d like.
Common Heat Press Mistakes We Recommend Avoiding
These are the mistakes we see most often—and they’re almost all preventable with the right information.
- Not allowing the press to fully preheat. A press that hasn’t reached a stable temperature will produce inconsistent results from the first press onward.
- Using incorrect temperatures. Always follow your transfer or HTV manufacturer’s specifications—not generic guides.
- Applying too much or too little pressure. Both extremes cause adhesion failures.
- Ignoring cold spots. Verify your platen temperature with a thermometer, not just the display.
- Using the wrong platen for the product. A flat platen on a structured hat doesn’t make even contact.
- Skipping the pre-press step. Trapped moisture causes bubbles and inconsistent adhesion.
- Peeling at the wrong temperature. Hot-peel transfers and cold-peel transfers have opposite instructions for a reason.
- Overpressing. More time and heat is not always better—it can scorch fabric, collapse puff vinyl, or dull foil finishes.
- Not testing unfamiliar fabrics. Always run a test press on a scrap before committing to a full production run on a new material.
Accurate digital controls, consistent heat distribution, proper pressure, and following manufacturer instructions prevent the majority of these issues. The rest comes with experience.
Why We Pair a Reliable Heat Press With Professional DTF Transfers
Even the best heat press on the market cannot compensate for poor-quality transfers. If the film, ink, adhesive powder, or curing process is inconsistent on the transfer side, pressing results will be inconsistent regardless of how well-calibrated the machine is.
This is one of the core reasons we’ve focused so heavily on transfer quality at Limitless Transfers. We’ve earned back-to-back 1st Place recognition for Quality in DTF Printing in both 2024 and 2025—recognition based on our commitment to consistent, professional output.
Here’s what that commitment looks like in practice:
- Vibrant CMYK+W (Expanded Gamut CMYK+RGBO+W) color accuracy — precise color reproduction with refined ICC profiles that hold fine detail and produce stunning vibrancy
- True hot-peel convenience — peel immediately after pressing for faster production throughput
- Soft-hand feel — transfers feel lightweight and comfortable, even on large designs
- Wide material compatibility — works on 100% cotton, poly blends, tri-blends, nylon, leather, canvas, denim, neoprene, wood, and more
- No minimum orders — order exactly what you need, whether that’s one transfer or thousands
- Easy gang sheet builder — build and manage your layouts without needing advanced design software
- Same-day shipping on qualifying orders placed by noon EST
- Free UPS Ground shipping on orders over $50
Our goal is to give you a dependable, end-to-end system—from the heat presses and supplies you need to run production to the transfers that make every press count.
Start Creating Professional Heat Transfer Projects With Limitless Transfers
Successful heat pressing comes down to three fundamentals: consistent heat, correct pressure, and accurate timing. Get those three variables right on every press, and the results follow.
The best heat press machine for your business is the one that fits your products, your volume, your space, and your budget—not the cheapest option available or the most expensive one someone else is using. If you’re just getting started, don’t overcomplicate your first setup. A solid clamshell or auto-open press with reliable digital controls and a 15″ x 15″ platen handles the majority of apparel applications cleanly. As your volume grows, invest in reliability, repeatability, and the features that reduce operator variability in your production line.
We’re here to support both first-time creators pressing their first T-shirt and professional print shops pressing thousands of pieces per month. Explore our professional DTF transfers, heat presses, supplies, and easy-to-use ordering tools at Limitless Transfers.
Frequently Asked Questions
Is it worth buying a heat press machine?
For anyone regularly producing custom apparel or heat transfer products, a heat press is generally worth the investment. It provides more controlled temperature, consistent pressure, and accurate timing than a household iron—all of which translate directly to better results. For small businesses, those benefits become especially important when consistent quality and faster production are required to fulfill orders reliably.
Which heat press is best for a beginner?
A dependable clamshell or auto-open press with digital temperature and timer controls is a practical starting point. A 15″ x 15″ platen is a popular choice for apparel because it accommodates most standard adult shirt graphics without requiring an oversized machine. Focus on a press with consistent heat distribution and reliable controls rather than the lowest price point available.
Which is better, a Cricut or a heat press?
This depends on what you’re comparing. A Cricut cutting machine and a heat press perform entirely different jobs. A Cricut cutter creates cut designs from HTV or other materials, while a heat press applies heat transfers to fabric or substrates. Cricut’s handheld press products apply heat but differ from traditional clamping heat presses in how pressure is applied. For regular DTF production requiring consistent pressure and repeatable results across many pieces, a dedicated heat press machine generally offers greater control than a handheld pressing tool.
What is the main difference between a steam press and a heat press?
A steam press is designed primarily to press fabric and remove wrinkles using heat and steam. A heat press is specifically engineered to apply controlled, consistent heat and pressure for transferring graphics, adhesives, inks, or dyes onto compatible materials. The two tools are built for different purposes and are not interchangeable in a heat transfer production workflow